Welcome to the future of smart home technology! Installing smart switches can transform how you interact with your home’s lighting, providing convenience and energy savings. This step-by-step guide will help you navigate the installation process while ensuring safety and efficiency.
Table of Contents
- Understanding Smart Switches
- Tools You Will Need
- Step-by-Step Installation
- Troubleshooting Tips
- Key Takeaways
- FAQ
- Schedule Your Electrical Service Today
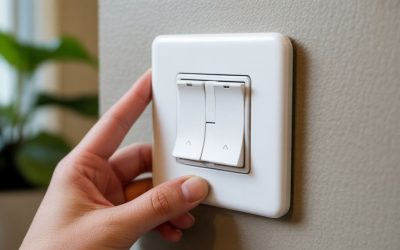
Understanding Smart Switches
Smart switches are electronic devices that allow you to control your lights from a smartphone or voice assistant. They replace traditional light switches and connect to your Wi-Fi network. This means you can turn your lights on or off, dim them, or even set schedules from anywhere.
Benefits include:
- Enhanced convenience
- Energy savings
- Remote access
- Scheduling options
With these features, smart switches can make daily routines easier and more efficient.
Tools You Will Need
Before starting the installation, gather the following tools:
- Screwdriver (flathead and Phillips)
- Wire strippers
- Voltage tester
- Electrical tape
- Pliers
Having these tools at your fingertips will make the installation process smoother and quicker.
Step-by-Step Installation
Installing a smart switch is a straightforward process if you follow each step carefully.
Step 1: Turn Off the Power
Safety comes first. Before starting, turn off the power at your circuit breaker to avoid any risk of electric shock. Use a voltage tester to ensure there’s no current in the wires.
Step 2: Remove the Old Switch
Once the power is off, remove the cover plate of the existing switch. Unscrew the switch and gently pull it out of the wall. Notice how the wires are connected, as you’ll need to replicate this setup with your new smart switch.
Step 3: Connect the Smart Switch
Follow the manufacturer’s instructions for connecting the smart switch. Typically, you will connect the wires as follows:
- Line wire (usually black): This brings in power.
- Load wire (also known as black or red): This wire runs to the light fixture.
- Ground wire (green or bare copper): This is important for safety.
Ensure each connection is secure and wrap it with electrical tape if necessary.
Step 4: Mount the Smart Switch
Carefully tuck the wires back into the wall box and mount the smart switch. Screw the switch in place and then attach the cover plate.
Step 5: Turn the Power Back On
Return to your circuit breaker and turn the power back on. Test the switch to ensure it is working correctly.
Step 6: Connect to Wi-Fi
Download the corresponding app for your smart switch from the App Store or Google Play. Follow the app’s instructions to connect your switch to your home Wi-Fi network.
Troubleshooting Tips
Sometimes, things don’t go as planned. Here are common issues and how to fix them:
- Switch does not turn on: Check if the power is turned on at the breaker and ensure all connections are secure.
- Cannot connect to Wi-Fi: Make sure your Wi-Fi network is active and within range.
- Lights flicker: Check the load requirements. Ensure the total wattage does not exceed the smart switch’s capacity.
Key Takeaways
– Smart switches enhance convenience and can save energy.
– Ensure you have the right tools before starting the installation.
– Following a step-by-step approach promotes safety.
– Troubleshooting is key to resolving common installation issues.
FAQ
What is a smart switch?
A smart switch is a device that allows you to control your lights via a smartphone app or voice assistant.
Can I install a smart switch without professional help?
Yes, if you follow the instructions carefully, you can install a smart switch yourself. However, if you are uncomfortable with electrical work, consider hiring a professional.
Are smart switches compatible with all light bulbs?
Most smart switches are compatible with standard LED and incandescent bulbs, but it’s wise to check the manufacturer’s guidelines for specific compatibility information.
How do I reset my smart switch?
Refer to the user manual for specific instructions on resetting the device. Typically, this involves flipping the switch on and off a particular number of times.
Will using a smart switch increase my energy bill?
No, smart switches are designed to save energy. You can schedule your lights to turn off when not in use.
Schedule Your Electrical Service Today
Ready to upgrade your home with smart technology? Don’t hesitate to reach out for professional assistance. Installing smart switches can be straightforward, but having an experienced electrician on hand can ensure safety and efficiency. For expert electrical services, Contact Us today!